Angular Javascript Frontend Framework - Part 13 (Adding a form to your Angular app)
- Introduction
- Add a service method to send form data to
- Add the form functions to the
DetailsComponent - Add the form’s markup to the details page
Introduction
This tutorial recaps the official documentation at https://angular.io/tutorial/first-app/first-app-lesson-12.
This tutorial lesson demonstrates how to add a form that collects user data to an Angular app. This lesson starts with a functional Angular app and shows how to add a form it.
The data that the form collects is sent only to the app’s service, which writes it to the browser’s console. Using a REST API to send and receive the form’s data is not covered in this lesson.
Your app will get a form into which users can enter data (an application request for a house) that is sent to your app’s service. The service writes the data from the form to the browser’s console.
Add a service method to send form data to
This step adds the method submitApplication to your app’s service that receives the form data to send to the data’s destination.
In this example, the method writes the data from the form to the browser’s console log.
File src/app/housing.service.ts:
  ...
  getHousingLocationById(id: number): HousingLocation | undefined {
    return this.housingLocationList.find(housingLocation => housingLocation.id === id);
  }

  submitApplication(firstName: string, lastName: string, email: string) {
    console.log(`Homes application received: firstName: ${firstName}, lastName: ${lastName}, email: ${email}.`);
  }
}
Add the form functions to the DetailsComponent
This step adds the code to the details component that handles the form interactions.
- After the import statements at the top of the file, add the needed
@angular/forms-import for the Angular form classes - In the
DetailsComponentdecorator metadata, update the imports property withReactiveFormsModule - In the
DetailsComponentclass, before the constructor() method, add code to create a form objectapplyForm - In the
DetailsComponentclass, after the constructor() method, add the methodsubmitApplicationthat will handle the Apply now click and calls the underlying service.
File src/app/details/details.component.ts:
import { Component, inject } from '@angular/core';
import { CommonModule } from '@angular/common';
import { FormControl, FormGroup, ReactiveFormsModule } from '@angular/forms';
...

@Component({
  selector: 'app-details',
  standalone: true,
  imports: [CommonModule, ReactiveFormsModule],
  ...
})
export class DetailsComponent {
  applyForm = new FormGroup({
    firstName: new FormControl(''),
    lastName: new FormControl(''),
    email: new FormControl('')
  });
  route: ActivatedRoute = inject(ActivatedRoute);
  housingService = inject(HousingService);
  housingLocation: HousingLocation | undefined;

  constructor() {
    const housingLocationId = Number(this.route.snapshot.params['id']);
    this.housingLocation = this.housingService.getHousingLocationById(housingLocationId);
  }

  submitApplication() {
    this.housingService.submitApplication(
      this.applyForm.value.firstName ?? '',
      this.applyForm.value.lastName ?? '',
      this.applyForm.value.email ?? ''
    );
  }
}
In Angular, FormGroup and FormControl are types that enable you to build forms.
The FormControl type can provide a default value and shape the form data. In this example firstName is a string and the default value is an empty string.
The form GUI (fields and submitting button) do not exist yet - you will add them in the next step.
In the above code, the FormControls may return null. This code uses the nullish coalescing operator ?? to default to empty string if the value is null.
The app should still work without errors.
Add the form’s markup to the details page
This step adds the markup to the details page that displays the form.
- In the
DetailsComponentdecorator metadata, update the template HTML to add the form’s markup (fields and button).
File src/app/details/details.component.ts:
template: `
  <article>
    <img class="listing-photo" [src]="housingLocation?.photo"
      alt="Exterior photo of "/>
    <section class="listing-description">
      <h2 class="listing-heading"></h2>
      <p class="listing-location">, </p>
    </section>
    <section class="listing-features">
      <h2 class="section-heading">About this housing location</h2>
      <ul>
        <li>Units available: </li>
        <li>Does this location have wifi: </li>
        <li>Does this location have laundry: </li>
      </ul>
    </section>
    <section class="listing-apply">
      <h2 class="section-heading">Apply now to live here</h2>
      <form [formGroup]="applyForm" (submit)="submitApplication()">
        <label for="first-name">First Name</label>
        <input id="first-name" type="text" formControlName="firstName">

        <label for="last-name">Last Name</label>
        <input id="last-name" type="text" formControlName="lastName">

        <label for="email">Email</label>
        <input id="email" type="email" formControlName="email">
        <button type="submit" class="primary">Apply now</button>
      </form>
    </section>
  </article>
`,
The template now includes an event handler on the form element: (submit)="submitApplication()".
Angular uses parentheses syntax around the event name to create define events in the template code.
The code on the right hand side of the equals sign (submitApplication()) is the code that should be executed when this event is triggered.
You can bind to browser events and custom events.
Test:
- Browse to details page: it should contain the form fields.
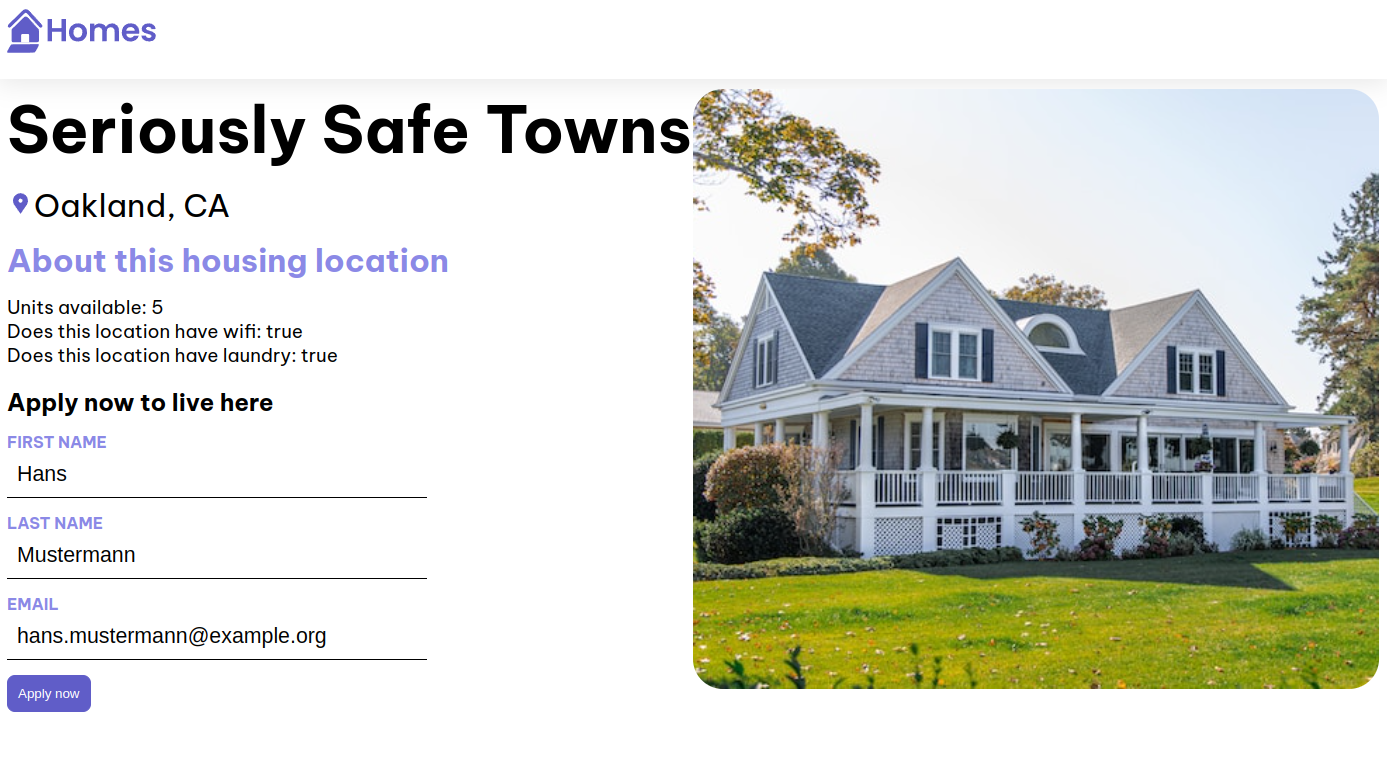
- Open developer tools window of the browser, choose the Console tab
- Fill form fields and click “Apply now”
- Form data should be printed to console:
Homes application received: firstName: Hans, lastName: Mustermann, email: hans.mustermann@example.org.