Angular Tutorial - Tour of Heroes - Part 4 (Create a feature component)
- Introduction
- Make the HeroDetailComponent
- Write the template
- Add the @Input() hero property
- Show the HeroDetailComponent
- What changed?
Introduction
This tutorial recaps the official documentation at https://angular.io/tutorial/tour-of-heroes/toh-pt3.
At the moment, the HeroesComponent displays both the list of heroes and the selected hero’s details.
Keeping all features in one component as the application grows won’t be maintainable. This tutorial splits up large components into smaller subcomponents, each focused on a specific task or workflow.
The first step is to move the hero details into a separate, reusable HeroDetailComponent and end up with:
- A HeroesComponent that presents the list of heroes.
- A HeroDetailComponent that presents the details of a selected hero.
Make the HeroDetailComponent
Use this ng generate command to create a new component named hero-detail
$ cd tutorial-angular-tour-of-heroes
$ ng generate component hero-detail
CREATE src/app/hero-detail/hero-detail.component.css (0 bytes)
CREATE src/app/hero-detail/hero-detail.component.html (26 bytes)
CREATE src/app/hero-detail/hero-detail.component.spec.ts (588 bytes)
CREATE src/app/hero-detail/hero-detail.component.ts (221 bytes)
UPDATE src/app/app.module.ts (585 bytes)
The command scaffolds the following:
- Creates a directory
src/app/hero-detail.
Inside that directory, four files are created:
- A CSS file for the component styles.
- An HTML file for the component template.
- A TypeScript file with a component class named
HeroDetailComponent. - A test file for the
HeroDetailComponentclass.
The command also adds the HeroDetailComponent as a declaration in the @NgModule decorator of the src/app/app.module.ts file and adds the necessary import statement.
Write the template
Cut the HTML for the hero detail from the bottom of the HeroesComponent template and paste it over the boilerplate content in the HeroDetailComponent template.
File src/app/hero-detail/hero-detail.component.html:
<div *ngIf="selectedHero">
  <h2>{{selectedHero.name | uppercase}} Details</h2>
  <div>id: {{selectedHero.id}}</div>
  <div>
    <label for="hero-name">Hero name: </label>
    <input id="hero-name" [(ngModel)]="selectedHero.name" placeholder="name">
  </div>
</div>
The pasted HTML refers to a selectedHero. The new HeroDetailComponent can present any hero, not just a selected hero. Replace selectedHero with hero everywhere in the template.
File src/app/hero-detail/hero-detail.component.html:
<div *ngIf="hero">

  <h2>{{hero.name | uppercase}} Details</h2>
  <div><span>id: </span>{{hero.id}}</div>
  <div>
    <label for="hero-name">Hero name: </label>
    <input id="hero-name" [(ngModel)]="hero.name" placeholder="name">
  </div>

</div>
Add the @Input() hero property
The HeroDetailComponent template binds to the component’s hero property which is of type Hero.
Open the HeroDetailComponent class file and import the Hero symbol.
File src/app/hero-detail/hero-detail.component.ts:
import { Hero } from '../hero';
The hero property must be an Input property (see https://angular.io/guide/inputs-outputs), annotated with the @Input() decorator, because the external HeroesComponent will bind to it like this: <app-hero-detail [hero]="selectedHero"></app-hero-detail> (will be added later, see below).
Amend the @angular/core import statement to include the Input symbol and add a hero property, preceded by the @Input() decorator.
File src/app/hero-detail/hero-detail.component.ts:
import { Component, Input } from '@angular/core';

import { Hero } from '../hero';

@Component({
  selector: 'app-hero-detail',
  templateUrl: './hero-detail.component.html',
  styleUrls: ['./hero-detail.component.css']
})
export class HeroDetailComponent {
  @Input() hero?: Hero;
}
That’s the only change you should make to the HeroDetailComponent class. There are no more properties. There’s no presentation logic. This component only receives a hero object through its hero property and displays it.
Show the HeroDetailComponent
The HeroesComponent used to display the hero details on its own, before you removed that part of the template. This section guides you through delegating logic to the HeroDetailComponent.
The two components have a parent/child relationship. The parent, HeroesComponent, controls the child, HeroDetailComponent by sending it a new hero to display whenever the user selects a hero from the list.
You don’t need to change the HeroesComponent class, instead change its template.
Update the HeroesComponent template
The HeroDetailComponent selector is ‘app-hero-detail’. Add an <app-hero-detail> element near the bottom of the HeroesComponent template, where the hero detail view used to be.
Bind the HeroesComponent.selectedHero to the element’s hero property like this.
File src/app/heroes/heroes.component.html:
<app-hero-detail [hero]="selectedHero"></app-hero-detail>
[hero]="selectedHero" is an Angular property binding (see https://angular.io/guide/property-binding).
It’s a one-way data binding from the selectedHero property of the HeroesComponent to the hero property of the target element, which maps to the hero property of the HeroDetailComponent.
Now when the user clicks a hero in the list, the selectedHero changes. When the selectedHero changes, the property binding updates hero and the HeroDetailComponent displays the new hero.
The revised HeroesComponent template should look like this:
File src/app/heroes/heroes.component.html:
<h2>My Heroes</h2>

<ul class="heroes">
  <li *ngFor="let hero of heroes">
    <button [class.selected]="hero === selectedHero" type="button" (click)="onSelect(hero)">
      <span class="badge">{{hero.id}}</span>
      <span class="name">{{hero.name}}</span>
    </button>
  </li>
</ul>

<app-hero-detail [hero]="selectedHero"></app-hero-detail>
The browser refreshes and the application starts working again as it did before.
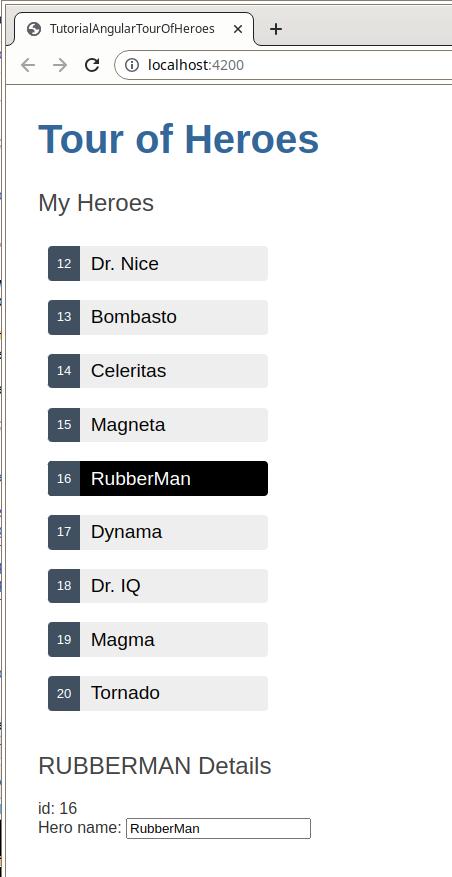
What changed?
As before, whenever a user clicks on a hero name, the hero detail appears below the hero list. Now the HeroDetailComponent is presenting those details instead of the HeroesComponent.
Refactoring the original HeroesComponent into two components yields benefits, both now and in the future:
- You reduced the
HeroesComponentresponsibilities. - You can evolve the
HeroDetailComponentinto a rich hero editor without touching the parentHeroesComponent. - You can evolve the
HeroesComponentwithout touching the hero detail view. - You can re-use the
HeroDetailComponentin the template of some future component.